
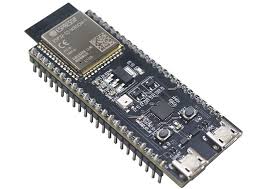
The ESP32 microcontroller is one of the most widely deployed chips in IoT — dual-core Xtensa CPU, built-in Wi-Fi and Bluetooth, and enough processing power for sensor aggregation, motor control, and edge inference. Getting remote access to a deployed ESP32 device is a common and legitimate operational need: reading live sensor values, pushing configuration changes, sending commands, or delivering firmware updates — all without a site visit.
The challenge is architectural. The ESP32 runs FreeRTOS, not Linux. It has no Linux userspace, no SSH daemon, no package manager, and no ability to run a Linux binary like the SocketXP agent. Tutorials that tell you to sudo systemctl enable ssh on an ESP32 are describing a different class of hardware entirely.
This article describes the correct architecture for ESP32 remote access using SocketXP: a Linux gateway on the same network runs the SocketXP agent and provides the remote access channel, while the ESP32 communicates to the gateway over local Wi-Fi using protocols it natively supports (MQTT, HTTP, UART).
Architecture Overview
                    Remote Operator / Developer
                              │
                              │  SocketXP Cloud Gateway
                              │  (SSL/TLS tunnel)
                              │
                    ┌─────────▼──────────┐
                    │   Linux Gateway    │
                    │  (Raspberry Pi,    │
                    │  Jetson, x86 PC,   │
                    │  or any Linux SBC) │
                    │                    │
                    │  SocketXP agent    │
                    │  Mosquitto broker  │
                    │  Bridge service    │
                    └─────────┬──────────┘
                              │ local Wi-Fi (MQTT / HTTP)
                              │ or UART/SPI/I²C (wired)
                    ┌─────────▼──────────┐
                    │  ESP32 (FreeRTOS)  │
                    │  Sensor / actuator │
                    │  mbedTLS + paho    │
                    └────────────────────┘
The Linux gateway — a Raspberry Pi, NVIDIA Jetson, industrial x86 gateway, or any Linux single-board computer on the same local network — runs the SocketXP agent. It is the device that has a secure outbound tunnel to the SocketXP Cloud Gateway and is remotely accessible from anywhere.
The ESP32 connects to the Linux gateway over local Wi-Fi using MQTT or HTTP — protocols that are natively supported by ESP-IDF’s built-in libraries. It publishes sensor data to the gateway’s MQTT broker and subscribes to command topics. It does not connect directly to the internet for management purposes.
This architecture is correct, practical, and maps to the way most production ESP32 deployments are actually structured: an ESP32 handles real-time sensing and actuation at the edge; a more capable Linux companion device handles communication, storage, and management connectivity.
What You Need
- An ESP32 development board (ESP32, ESP32-S2, ESP32-S3, ESP32-C3, or ESP32-C6) with ESP-IDF v5.x
- A Linux gateway device on the same local network (Raspberry Pi, NVIDIA Jetson, or any Debian/Ubuntu Linux device)
- A valid SocketXP account and auth token (from the SocketXP portal)
- The SocketXP agent installed on the Linux gateway (download)
Want Remote Access to Your ESP32 Sensor Data?
No cloud MQTT broker needed. Get a secure tunnel to your gateway from anywhere.
Step 1: Set Up the Linux Gateway with SocketXP
All SocketXP setup happens on the Linux gateway, not on the ESP32.
Install the SocketXP Agent
On the Linux gateway, download and install the SocketXP agent:
curl -O https://portal.socketxp.com/download/linux/socketxp
chmod +x socketxp
sudo mv socketxp /usr/local/bin/
Register the Gateway with SocketXP
socketxp login
Expose the Gateway’s SSH Service
socketxp connect tcp://localhost:22
The gateway now appears in the SocketXP portal under Devices. You can SSH into it from anywhere using the SocketXP web terminal or IoT Slave Mode from your development machine.
Install Mosquitto MQTT Broker on the Gateway
The ESP32 will publish its sensor data to a Mosquitto broker running locally on the gateway. Install it:
sudo apt-get install -y mosquitto mosquitto-clients
sudo systemctl enable mosquitto
sudo systemctl start mosquitto
Mosquitto listens on port 1883 by default (local network only). Since the broker is only reachable on the local network — not exposed to the internet — this is suitable for most deployments.
Step 2: Configure the ESP32 to Publish Data to the Gateway
On the ESP32 side, use ESP-IDF’s MQTT client to connect to the Mosquitto broker on the Linux gateway and publish sensor readings.
ESP-IDF MQTT Client Configuration
#include "mqtt_client.h" #include "esp_log.h" #includestatic const char *TAG = "esp32_gateway"; /* Replace with your Linux gateway's local IP address */ #define GATEWAY_IP "192.168.1.100" #define MQTT_PORT 1883 #define DEVICE_ID "esp32-sensor-001" static void mqtt_event_handler(void *arg, esp_event_base_t base, int32_t event_id, void *event_data) { esp_mqtt_event_handle_t event = event_data; switch (event->event_id) { case MQTT_EVENT_CONNECTED: ESP_LOGI(TAG, "Connected to gateway MQTT broker"); /* Subscribe to command topic so the gateway can send instructions */ esp_mqtt_client_subscribe(event->client, "commands/" DEVICE_ID "/#", 1); break; case MQTT_EVENT_DATA: ESP_LOGI(TAG, "Command received: topic=%.*s payload=%.*s", event->topic_len, event->topic, event->data_len, event->data); /* Handle incoming command from the operator via the gateway */ handle_remote_command(event->topic, event->topic_len, event->data, event->data_len); break; default: break; } } void start_mqtt_and_publish(void) { esp_mqtt_client_config_t cfg = { .broker.address.uri = "mqtt://" GATEWAY_IP ":" XSTR(MQTT_PORT), }; esp_mqtt_client_handle_t client = esp_mqtt_client_init(&cfg); esp_mqtt_client_register_event(client, ESP_EVENT_ANY_ID, mqtt_event_handler, NULL); esp_mqtt_client_start(client); /* Publish a sensor reading every 10 seconds */ while (1) { float temperature = read_temperature_sensor(); float humidity = read_humidity_sensor(); char payload[128]; snprintf(payload, sizeof(payload), "{\"device\":\"%s\",\"temp\":%.1f,\"humidity\":%.1f}", DEVICE_ID, temperature, humidity); esp_mqtt_client_publish(client, "sensors/" DEVICE_ID "/data", payload, 0, 1, 0); ESP_LOGI(TAG, "Published: %s", payload); vTaskDelay(pdMS_TO_TICKS(10000)); } }
The ESP32 connects to the local Mosquitto broker on the gateway (not to the internet directly), publishes its sensor data, and subscribes to a command topic so it can receive instructions from a remote operator.
Step 3: Access ESP32 Data Remotely via the Gateway
With the gateway accessible through SocketXP and the ESP32 publishing to Mosquitto on the gateway, a remote operator can subscribe to live sensor data in two ways.
Method A: SSH into the Gateway and Subscribe
# From the SocketXP portal web terminal, or via IoT Slave Mode on your laptop:
# SSH into the Linux gateway, then subscribe to all ESP32 sensor topics

mosquitto_sub -h localhost -p 1883 -t "sensors/esp32-sensor-001/#" -v
# Output:
# sensors/esp32-sensor-001/data {"device":"esp32-sensor-001","temp":24.3,"humidity":58.1}
# sensors/esp32-sensor-001/data {"device":"esp32-sensor-001","temp":24.5,"humidity":57.9}
Method B: Expose a Data Dashboard via SocketXP HTTP Tunnel
Run a lightweight web dashboard on the gateway that displays ESP32 data:
# On the gateway — start a Python-based MQTT-to-HTTP bridge (example)
python3 -m pip install flask paho-mqtt
python3 esp32_dashboard.py &   # Listens on port 8080

# Expose the dashboard through SocketXP
socketxp connect http://localhost:8080
# Returns a public HTTPS URL for the dashboard
The dashboard receives data from Mosquitto via MQTT and serves it as a web page accessible through the SocketXP HTTPS tunnel — from any browser, anywhere.
Step 4: Send Remote Commands to the ESP32
Operators can send commands to the ESP32 by publishing to its command topic from the gateway’s SSH session:
# SSH into the gateway via SocketXP, then publish a command to the ESP32

# Turn on an LED
mosquitto_pub -h localhost -p 1883 \
  -t "commands/esp32-sensor-001/led" \
  -m '{"action":"on","color":"red"}'

# Change the sensor sampling interval to 5 seconds
mosquitto_pub -h localhost -p 1883 \
  -t "commands/esp32-sensor-001/config" \
  -m '{"sampling_interval_ms":5000}'

# Trigger an immediate sensor reading
mosquitto_pub -h localhost -p 1883 \
  -t "commands/esp32-sensor-001/read" \
  -m '{"immediate":true}'
The ESP32, which subscribes to commands/esp32-sensor-001/#, receives these payloads and executes the corresponding action in its handle_remote_command() function. The round-trip is: operator → SocketXP tunnel → gateway SSH → mosquitto_pub → local MQTT → ESP32.
Step 4b: Interactive Console Access to the ESP32 via Telnet from the Gateway
MQTT command delivery is well-suited for scripted, automated operations. For interactive debugging sessions — querying live state, changing parameters on the fly, or troubleshooting a specific device — a telnet console on the ESP32 gives you a direct interactive prompt accessible from the Linux gateway over the local Wi-Fi link.
The ESP32 runs a lightweight TCP server on port 23. The Linux gateway connects using telnet or nc. Because this connection stays on the local network between the gateway and the ESP32, it is never exposed to the internet.
ESP32 Telnet Console Server (ESP-IDF)
Add the following to your ESP32 application. The telnet task starts after Wi-Fi is connected:
#include "freertos/FreeRTOS.h" #include "freertos/task.h" #include "lwip/sockets.h" #include "esp_log.h" #include#include #define TELNET_PORT 23 #define CMD_BUF_SIZE 256 static const char *TAG = "esp32_telnet"; /* Register the commands your console understands */ static void dispatch_command(int sock, const char *cmd) { char response[256]; if (strcmp(cmd, "status") == 0) { snprintf(response, sizeof(response), "temp=%.1f humidity=%.1f uptime=%lus\r\n", read_temperature_sensor(), read_humidity_sensor(), (unsigned long)(esp_timer_get_time() / 1000000)); } else if (strncmp(cmd, "interval ", 9) == 0) { int ms = atoi(cmd + 9); set_sampling_interval_ms(ms); snprintf(response, sizeof(response), "Sampling interval set to %d ms\r\n", ms); } else if (strcmp(cmd, "reset") == 0) { send(sock, "Restarting...\r\n", 15, 0); vTaskDelay(pdMS_TO_TICKS(100)); esp_restart(); } else if (strcmp(cmd, "help") == 0) { snprintf(response, sizeof(response), "Commands:\r\n" " status — print current sensor readings and uptime\r\n" " interval — set sampling interval in milliseconds\r\n" " reset — restart the device\r\n" " quit — close this telnet session\r\n"); } else if (strcmp(cmd, "quit") == 0 || strcmp(cmd, "exit") == 0) { send(sock, "Bye.\r\n", 6, 0); close(sock); vTaskDelete(NULL); } else { snprintf(response, sizeof(response), "Unknown command: %s (type 'help')\r\n", cmd); } send(sock, response, strlen(response), 0); } static void telnet_client_task(void *arg) { int sock = (int)(intptr_t)arg; char buf[CMD_BUF_SIZE]; int pos = 0; const char *banner = "\r\n=== ESP32 Remote Console ===\r\n" "Type 'help' for available commands.\r\n> "; send(sock, banner, strlen(banner), 0); int n; while ((n = recv(sock, buf + pos, 1, 0)) > 0) { char c = buf[pos]; /* Echo the character back so the terminal displays it */ send(sock, &c, 1, 0); if (c == '\n' || c == '\r') { send(sock, "\r\n", 2, 0); buf[pos] = '\0'; /* Strip carriage return if line ended with \r\n */ if (pos > 0 && buf[pos - 1] == '\r') buf[--pos] = '\0'; if (pos > 0) dispatch_command(sock, buf); pos = 0; send(sock, "> ", 2, 0); } else if (c == 127 || c == '\b') { /* Backspace */ if (pos > 0) { pos--; send(sock, "\b \b", 3, 0); } } else if (pos < CMD_BUF_SIZE - 2) { pos++; } } close(sock); ESP_LOGI(TAG, "Telnet client disconnected"); vTaskDelete(NULL); } void start_telnet_server(void) { struct sockaddr_in addr = { .sin_family = AF_INET, .sin_addr.s_addr = htonl(INADDR_ANY), .sin_port = htons(TELNET_PORT), }; int server = socket(AF_INET, SOCK_STREAM, IPPROTO_TCP); int opt = 1; setsockopt(server, SOL_SOCKET, SO_REUSEADDR, &opt, sizeof(opt)); bind(server, (struct sockaddr *)&addr, sizeof(addr)); listen(server, 3); ESP_LOGI(TAG, "Telnet server ready on port %d", TELNET_PORT); while (1) { struct sockaddr_in client_addr; socklen_t len = sizeof(client_addr); int client = accept(server, (struct sockaddr *)&client_addr, &len); char ip[INET_ADDRSTRLEN]; inet_ntop(AF_INET, &client_addr.sin_addr, ip, sizeof(ip)); ESP_LOGI(TAG, "Telnet connection from %s", ip); /* Each client gets its own small task — 4 KB stack is sufficient */ xTaskCreate(telnet_client_task, "telnet_client", 4096, (void *)(intptr_t)client, 5, NULL); } }
Call start_telnet_server() from app_main() after Wi-Fi is connected, running it in its own FreeRTOS task:
xTaskCreate(start_telnet_server_task, "telnet_srv", 4096, NULL, 4, NULL);
Connecting from the Linux Gateway
After SSHing into the Linux gateway via the SocketXP portal or IoT Slave Mode, connect to the ESP32’s telnet console using the ESP32’s local IP address:
# Find the ESP32's local IP (check your router's DHCP table, or
# read it from the ESP32 serial output during boot)

# Connect using telnet
telnet 192.168.1.50 23

# Or using netcat if telnet is not installed on the gateway
nc 192.168.1.50 23
You will see the ESP32 console banner immediately:
=== ESP32 Remote Console === Type 'help' for available commands. > help Commands: status — print current sensor readings and uptime interval— set sampling interval in milliseconds reset — restart the device quit — close this telnet session > status temp=24.3 humidity=58.1 uptime=3721s > interval 2000 Sampling interval set to 2000 ms > quit Bye.
How This Fits in the Remote Access Flow
The full path from the remote operator to the ESP32 console is:
Remote operator
    │
    │  SocketXP tunnel (SSL/TLS)
    ▼
Linux gateway  ──── telnet 192.168.1.50 23 ────► ESP32 port 23
 (SSH session)          local Wi-Fi                 (FreeRTOS telnet task)
The telnet traffic travels over the local Wi-Fi segment between gateway and ESP32. It never reaches the internet. The operator’s connection to the gateway is secured by SocketXP’s SSL/TLS tunnel — the telnet leg is protected by the private local network.
Important Caveats
- Telnet is unencrypted on the wire. The data between the Linux gateway and the ESP32 travels as plaintext over local Wi-Fi. This is acceptable when both devices are on a trusted private network (home or office Wi-Fi, dedicated IoT VLAN), but is not appropriate on shared or public Wi-Fi segments.
- One active session at a time is the practical limit for the simple implementation above. The task-per-client model allows multiple connections, but the ESP32’s limited RAM means you should configure your firewall or application logic to restrict concurrent sessions.
- Not for high-throughput data. The telnet console is designed for interactive command exchange, not for streaming large amounts of sensor data. Use MQTT for data pipelines.
Step 5: Remote OTA Firmware Updates to the ESP32
Delivering a new firmware binary to a deployed ESP32 without a site visit requires two stages: getting the firmware onto the gateway, and getting it from the gateway onto the ESP32.
Stage 1: Deliver Firmware to the Gateway via SocketXP OTA
Use SocketXP’s OTA file delivery to push the compiled ESP32 firmware binary to the Linux gateway:
# From the SocketXP portal, upload the firmware binary to the gateway device
# The gateway stores it at a known path, e.g.:
# /opt/esp32-firmware/esp32-sensor-app.bin
Stage 2: Flash the ESP32 from the Gateway
If the ESP32 is connected to the gateway via USB/UART (common during development or for devices near the gateway):
# On the gateway — flash the ESP32 over UART using esptool.py
pip3 install esptool

esptool.py --chip esp32 --port /dev/ttyUSB0 --baud 921600 \
  write_flash -z 0x1000 /opt/esp32-firmware/esp32-sensor-app.bin
If the ESP32 is remote from the gateway but connected over Wi-Fi, use ESP-IDF’s built-in HTTP OTA mechanism. The gateway hosts the firmware file on a local HTTP server, and the ESP32 downloads and self-flashes:
# On the gateway — serve the firmware over HTTP (after SocketXP OTA delivers it)
cd /opt/esp32-firmware
python3 -m http.server 8070 &

# The ESP32 then fetches it from http://192.168.1.100:8070/esp32-sensor-app.bin
ESP32 OTA code (triggered by a remote command via MQTT):
#include "esp_ota_ops.h"
#include "esp_http_client.h"
#include "esp_log.h"

#define GATEWAY_OTA_URL "http://192.168.1.100:8070/esp32-sensor-app.bin"

void perform_ota_update(void)
{
    ESP_LOGI("OTA", "Starting OTA from gateway: %s", GATEWAY_OTA_URL);

    esp_http_client_config_t http_cfg = {
        .url = GATEWAY_OTA_URL,
    };

    esp_https_ota_config_t ota_cfg = {
        .http_config = &http_cfg,
    };

    esp_err_t ret = esp_https_ota(&ota_cfg);
    if (ret == ESP_OK) {
        ESP_LOGI("OTA", "Firmware update complete — restarting");
        esp_restart();
    } else {
        ESP_LOGE("OTA", "OTA failed: %s", esp_err_to_name(ret));
    }
}
The operator triggers OTA by publishing to the ESP32’s command topic from the gateway:
mosquitto_pub -h localhost -p 1883 \
  -t "commands/esp32-sensor-001/ota" \
  -m '{"url":"http://192.168.1.100:8070/esp32-sensor-app.bin"}'
The ESP32 receives the command, calls perform_ota_update(), downloads the new firmware from the gateway’s local HTTP server, validates it, writes it to the OTA partition, and reboots — all without any direct internet exposure of the ESP32 itself.
Step 6: Persistent SocketXP Gateway Configuration
For production deployments, configure the SocketXP agent as a systemd service on the gateway so it reconnects automatically on boot and network interruptions:
# /etc/socketxp/config.json on the Linux gateway
{
    "tunnels": [
        {
            "destination": "tcp://127.0.0.1:22",
            "custom_domain": "",
            "name": "esp32-gateway-ssh"
        },
        {
            "destination": "http://127.0.0.1:8080",
            "custom_domain": "",
            "name": "esp32-data-dashboard"
        }
    ]
}
sudo socketxp service install --config /etc/socketxp/config.json
sudo systemctl enable socketxp
sudo systemctl start socketxp
Why the Linux Gateway Architecture Is the Right Design
| Concern | Direct internet ESP32 | Linux gateway + SocketXP |
|---|---|---|
| ESP32 exposes ports to internet | Yes — high attack surface | No — ESP32 never has inbound internet connections |
| Firmware update delivery | Custom cloud OTA service required | SocketXP OTA to gateway + local HTTP to ESP32 |
| Sensor data access | Requires cloud MQTT broker subscription | SSH to gateway + local mosquitto_sub |
| Remote command delivery | Requires cloud message queue | Gateway SSH + local mosquitto_pub |
| Authentication at the edge | Per-device cloud credentials required | Local MQTT over private network; no internet-facing credentials on ESP32 |
| Agent binary compatibility | ESP32 (FreeRTOS) cannot run Linux binaries | Gateway runs the Linux SocketXP agent |
| Network requirement on ESP32 | Must reach cloud endpoints | Must reach local gateway IP only |
The gateway architecture also makes the system more resilient: the ESP32 continues collecting and buffering sensor data even when the internet connection is down, and syncs to the gateway when connectivity resumes.
Next Steps
- Zero-Touch Provisioning for IoT Devices — automating Linux gateway provisioning at scale
- IoT Remote Access for 10,000 Devices — scaling the gateway architecture to large ESP32 fleets
- Remote IoT Security: The Ultimate Guide — end-to-end security practices for remote IoT deployments/
- IoT Device Management Platform — fleet-level monitoring, OTA updates, and remote access management
Frequently Asked Questions
Can I access an ESP32 that has no Linux companion device?
If the ESP32 is the only device at the deployment site, it must connect directly to a cloud MQTT broker or HTTPS backend for data. Remote management — commands, OTA — then requires a cloud-side MQTT topic delivery or an HTTPS endpoint the ESP32 polls. SocketXP is not involved in that path because the ESP32 cannot run the SocketXP agent binary. A Linux gateway on the same network is the recommended approach for SocketXP-based remote access.
What is the minimum Linux gateway I can use?
Any Linux device that can run the SocketXP agent binary works: Raspberry Pi Zero 2W (512MB RAM), Orange Pi, BeagleBone, or any x86/ARM64 Linux SBC. The SocketXP agent is a small statically-linked binary with no heavy dependencies.
Can the gateway support multiple ESP32 devices?
Yes. Mosquitto handles hundreds of concurrent MQTT connections on even a Raspberry Pi 4. Each ESP32 uses a unique device ID in its topic paths (sensors/esp32-sensor-001/, sensors/esp32-sensor-002/). The gateway bridges all of them over a single SocketXP tunnel.
Can SocketXP push firmware to the ESP32 directly?
Not directly — SocketXP's OTA delivery targets the Linux gateway. The gateway then uses esptool.py (for UART-connected ESP32s) or hosts a local HTTP server for ESP32's built-in OTA mechanism (for Wi-Fi-connected ESP32s).
Does this architecture work if the ESP32 and gateway are on different networks?
They must be on the same local network (or at minimum the ESP32 must be able to reach the gateway's IP). If they are on different networks, the ESP32 would need to connect to a cloud MQTT broker directly rather than to the local gateway broker.